
Building a personal computer from scratch is one of the most rewarding technical projects a person can undertake, whether the goal is gaming, productivity, content creation, or simply understanding how technology works. Instead of purchasing a prebuilt machine that may include compromises in performance, cooling, or upgrade potential, assembling a computer yourself allows complete control over every component, ensures better value for money, and provides a deeper understanding of how hardware interacts. While the idea may seem intimidating at first, the process becomes manageable when broken down into logical stages: planning, selecting components, preparing the workspace, assembling hardware, installing software, and testing performance. This guide explains the entire process in detail, providing practical advice, clear steps, and useful tables to help beginners and intermediate users build a PC confidently.
Understanding the Basics of PC Building
Before purchasing parts or opening any boxes, it is important to understand what a computer actually consists of and how each component contributes to overall performance. A personal computer is essentially a collection of hardware parts that communicate with one another through a central circuit board. Each component has a specific role, and choosing compatible parts ensures that the system works smoothly and efficiently. The central processing unit (CPU) acts as the brain of the computer, executing instructions and performing calculations. The motherboard serves as the main hub connecting all components, while memory (RAM) temporarily stores data that the CPU needs quick access to. Storage drives hold the operating system and files, and the graphics processing unit (GPU) handles visual output, particularly for gaming and video editing. A power supply unit (PSU) delivers electricity to every part, and the computer case houses and protects everything while managing airflow.
Understanding these core functions helps builders make informed decisions about performance needs. For example, someone interested in video editing may prioritize more RAM and a powerful CPU, while a gamer might focus on a strong GPU and fast storage. Recognizing these priorities helps balance the budget and prevents overspending on unnecessary parts.
Planning Your PC Build
The planning phase is often overlooked, but it is one of the most critical steps in building a computer. Without a clear plan, it is easy to purchase incompatible parts or exceed the budget. Begin by defining the purpose of the computer. Is it for gaming, office work, programming, streaming, or general use? Each use case influences component choices and spending priorities. After defining the purpose, set a realistic budget that includes not only the main components but also accessories such as a monitor, keyboard, mouse, and operating system.
Once the purpose and budget are established, the next step is selecting components that work together. Compatibility is crucial. The CPU must match the motherboard socket, the RAM must be supported by the motherboard, and the power supply must provide enough wattage for all components. It is helpful to create a checklist and verify compatibility before purchasing. Many beginners find it useful to choose a motherboard first because it determines which CPUs, memory types, and expansion options will be available.
Essential Components and Their Roles
The following table outlines the essential components required to build a functional PC and their primary roles.
| Component | Function | Key Considerations |
|---|---|---|
| CPU | Processes instructions and calculations | Performance needs, compatibility with motherboard |
| Motherboard | Connects all components | Socket type, RAM support, expansion slots |
| RAM | Temporary data storage for quick access | Capacity, speed, compatibility |
| Storage (SSD/HDD) | Long-term data storage | Speed, capacity, reliability |
| GPU | Handles graphics and visual output | Gaming or design requirements |
| PSU | Provides power to all components | Wattage, efficiency rating |
| Case | Houses and protects hardware | Size, airflow, compatibility |
| Cooling | Prevents overheating | Air or liquid cooling options |
Each of these components must work together seamlessly, so careful selection is essential. For instance, a high-end GPU requires a power supply with sufficient wattage and connectors. Similarly, a large motherboard requires a case that can physically accommodate it.
Choosing the Right Components
Selecting components involves balancing performance, price, and future upgrade potential. For the CPU, consider the number of cores and clock speed. More cores benefit multitasking and productivity, while higher clock speeds improve gaming and single-threaded tasks. When choosing RAM, 16 GB is typically sufficient for most users, though 32 GB may benefit heavy multitasking or creative work. Storage should ideally include a fast solid-state drive for the operating system and frequently used programs, paired with a larger drive for additional files.
The graphics card is often the most expensive component in a gaming build, so it should match the intended display resolution and performance expectations. A powerful GPU is unnecessary for basic office work but essential for modern gaming and 3D rendering. The power supply should never be overlooked, as it affects stability and safety. Choose a reputable brand with an efficiency rating and enough wattage to support all components with room for future upgrades.
Preparing Your Workspace
A clean and organized workspace makes the building process easier and safer. Choose a large, well-lit surface with enough room to spread out components and tools. Avoid working on carpeted floors to reduce static electricity, which can damage sensitive electronics. Ground yourself by touching a metal object before handling components, and consider using an anti-static wrist strap for added safety.
Gather the necessary tools before starting. A Phillips screwdriver is essential, and small containers or magnetic trays help keep track of screws. Having thermal paste, cable ties, and a flashlight can also make the process smoother. Read the manuals for each component, especially the motherboard, as it contains important diagrams and instructions.
Step-by-Step PC Assembly
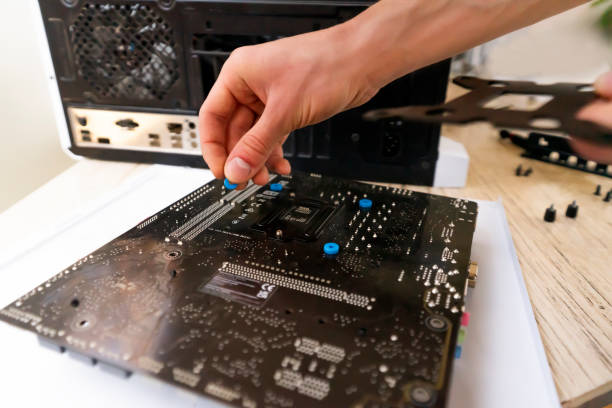
Installing the CPU
Begin by placing the motherboard on a flat surface. Carefully open the CPU socket lever and align the CPU with the socket using the small marker on the corner. Gently lower the CPU into place without applying pressure, then secure it with the socket lever. Proper alignment is crucial to avoid bending pins or damaging the socket.
Installing the RAM
Locate the RAM slots on the motherboard and open the retaining clips. Align the RAM sticks with the slots and press down firmly until they click into place. Ensure they are fully seated, as improperly installed RAM can prevent the system from booting.
Installing the Storage Drive
Mount the storage drive in the designated slot or bracket within the case. For solid-state drives, connect the data cable to the motherboard and the power cable from the power supply. Some modern drives connect directly to the motherboard without cables, simplifying installation.
Mounting the Motherboard
Place the motherboard into the case, aligning it with the standoffs and rear I/O shield. Secure it with screws, ensuring it sits firmly without overtightening. Proper alignment prevents short circuits and ensures stability.
Installing the Power Supply
Insert the power supply into its designated compartment and secure it with screws. Connect the main power cables to the motherboard, CPU, storage drives, and graphics card. Organize cables neatly to improve airflow and aesthetics.
Installing the Graphics Card
Insert the graphics card into the appropriate expansion slot on the motherboard and secure it with screws. Connect any required power cables from the power supply. Ensure the card is fully seated and stable.
Cooling and Final Connections
Install the CPU cooler and case fans according to instructions. Apply thermal paste if necessary. Connect front panel cables for power buttons, USB ports, and audio. Double-check all connections before closing the case.
Installing the Operating System
Once the hardware is assembled, the next step is installing the operating system. This typically involves creating a bootable installation drive using a USB stick. Insert the drive, power on the computer, and enter the BIOS or boot menu to select the installation device. Follow on-screen instructions to install the operating system on the primary storage drive. After installation, update drivers and system software to ensure optimal performance and compatibility.
Testing and Troubleshooting
After installation, test the system thoroughly. Check that all components are recognized, monitor temperatures, and run performance tests. If the system does not start, verify power connections, RAM placement, and front panel wiring. Troubleshooting requires patience, but most issues can be resolved by reviewing connections and consulting manuals.
Budget Planning Table
| Budget Range | Suggested Use | Key Component Focus |
|---|---|---|
| Low Budget | Office and browsing | Integrated graphics, basic CPU |
| Mid Budget | Gaming and productivity | Balanced CPU and GPU |
| High Budget | Content creation and high-end gaming | Powerful GPU and large RAM |
Maintenance and Upgrades
Building a PC does not end with assembly. Regular maintenance ensures longevity and performance. Clean dust from fans and filters periodically, update software and drivers, and monitor system temperatures. One of the biggest advantages of building your own PC is upgrade flexibility. You can replace the GPU, add more RAM, or upgrade storage without replacing the entire system. Planning for upgrades during the initial build can save money in the long run.
Common Mistakes to Avoid
Many beginners make avoidable mistakes when building their first PC. One common error is choosing incompatible parts, such as a CPU that does not match the motherboard socket. Another mistake is underestimating the importance of the power supply, which can lead to instability or hardware damage. Improper cable management can restrict airflow and cause overheating. Finally, rushing the assembly process can result in loose connections or misplaced screws. Taking time to double-check each step reduces the risk of problems.
Benefits of Building Your Own PC
Building a PC offers several advantages beyond cost savings. It allows complete customization, enabling users to choose exactly the features and performance levels they need. It also provides valuable technical knowledge and a sense of accomplishment. Understanding how each component works together can make future upgrades and troubleshooting easier. Additionally, custom-built PCs often offer better cooling and performance compared to prebuilt systems.
Conclusion
Building a PC is a detailed yet rewarding process that combines planning, technical understanding, and careful assembly. By selecting compatible components, preparing a proper workspace, and following step-by-step instructions, anyone can assemble a functional and efficient computer. The process not only saves money but also provides full control over performance, appearance, and upgrade potential. Whether the goal is gaming, productivity, or learning about hardware, building a PC is an excellent investment in both technology and personal skill development. With patience and attention to detail, even beginners can successfully create a powerful system tailored to their needs.
FAQs
1. Is building a PC difficult for beginners?
Building a PC may seem complex initially, but with clear instructions and patience, beginners can successfully assemble a computer without prior experience.
2. How long does it take to build a PC?
For a first-time builder, the process can take several hours, including assembly, cable management, and operating system installation.
3. What tools are required to build a PC?
A screwdriver, clean workspace, thermal paste, and cable ties are usually sufficient for assembling most computer systems.
4. Can I upgrade my PC later?
Yes, one of the main advantages of building a PC is the ability to upgrade components like RAM, storage, and graphics cards easily.
5. Do I need a graphics card for every build?
Not necessarily. Some CPUs include integrated graphics, which are sufficient for basic tasks, but gaming and design require dedicated GPUs.